
A leaking water heater can damage flooring, drywall, cabinets, and stored belongings within hours. A visible drip also signals a problem ranging from a loose connection to a failing tank. Homeowners should identify where water appears, reduce immediate risks, and decide whether a repair or replacement is appropriate. Quick action limits property damage, but safe handling matters because the unit combines hot water, pressure, gas, or electricity. Here are steps you can take to stay safe.
Diagnose the Leak
A leak can begin at a pipe joint, drain valve, relief valve, or the tank shell. Homeowners who trace water upward can identify its source before turning controls or moving equipment. For a leaking water heater, note the location, shut down the energy source, and protect nearby surfaces before arranging service. This basic check helps distinguish a fitting repair from a tank replacement.
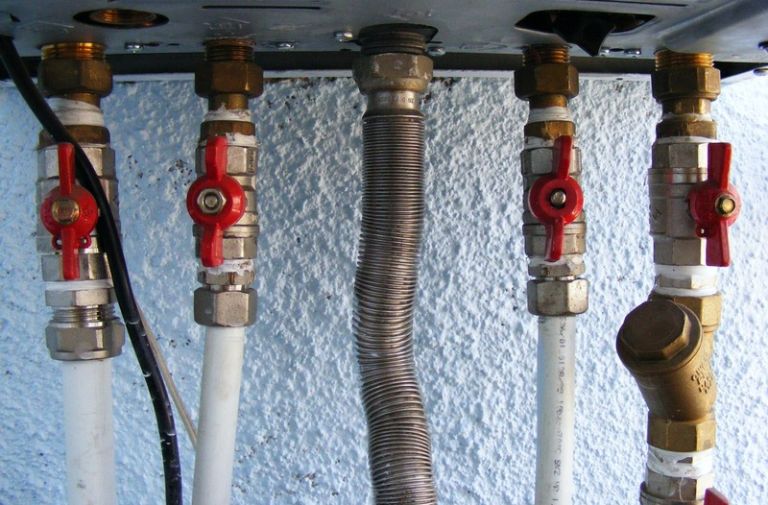
Water above the unit often runs down the sides, which can make it seem like the tank is the problem. Dry the exterior with a towel, then inspect the hot and cold water connections, the temperature-and-pressure relief valve, and the drain valve. Check again after several minutes to see which point becomes wet first.
Take Immediate Safety Steps
Turn off the water heater’s energy source before investigating further. For an electric model, switch off the dedicated circuit breaker. For a gas model, set the control to the manufacturer’s off position, and avoid flames or electrical switches if gas is present.
If water continues flowing, close the cold-water supply valve above the heater. A working valve limits incoming water and reduces damage while the homeowner waits for service. If the valve does not close, shut off the home’s main water supply.
Keep children and pets away from standing water, exposed wiring, and hot surfaces. Do not touch electrical components with wet hands. A large leak, a burst tank, visible wiring, or gas odor requires prompt professional assistance.
Check Common Leak Locations
Pipe connections commonly loosen or develop worn seals. A plumber can replace a fitting, gasket, or section of pipe when the tank remains sound. Tightening a connection too forcefully can damage threads, so homeowners should avoid using excessive pressure.
The temperature-and-pressure relief valve releases water when pressure or temperature reaches an unsafe level. Water from its discharge pipe can indicate a faulty valve or another pressure problem. Never cap, block, or remove this valve, because it protects the tank from dangerous pressure buildup.
A drain valve can drip after draining, flushing, or years of use. Placing a container beneath it can temporarily catch a small amount of water, but it doesn't fix the defect. A persistent drip needs a proper replacement or repair.
Know When Replacement Makes Sense
Water leaking from the tank body usually indicates corrosion inside the storage vessel. A storage tank has a protective lining and an anode rod, but corrosion eventually creates a breach. Once the shell leaks, patching the exterior does not restore a reliable seal.
The unit’s age, leak location, repair history, and operating condition guide the repair-or-replace decision. A sound tank with a failed valve often needs a repair. A corroded tank needs replacement because internal damage can continue even after the visible water stops.
Homeowners should record the model and serial numbers before requesting service. Those details help a technician identify the unit and check available warranty information. Photographs of the leak location also provide useful evidence when the water stops temporarily.
Reduce Future Leak Risk
Inspect connections and the floor around the heater several times each year. Early moisture, rust, or mineral deposits can reveal a developing problem before water reaches finished surfaces. Keep the area clear so a technician can quickly reach valves and connections.
Follow the manufacturer’s maintenance instructions for draining, flushing, and checking the anode rod. Maintenance needs vary by heater type and household water conditions. A licensed plumber should handle work involving gas controls, electrical components, pressure problems, or tank replacement.
A drain pan can direct minor leakage toward a suitable drain when local installation rules permit. It cannot contain a major tank failure or prevent damage if no drain path exists. Homeowners should also know the locations of the water shutoff and heater circuit breaker before an emergency occurs.
Conclusion
A leaking water heater requires a careful source check, quick utility shutoff, and a clear repair decision. Water from a fitting or valve often points to a serviceable component, while water from the tank body signals internal corrosion and the need for replacement. Homeowners should photograph the leak, record the model and serial numbers, and contact a qualified plumber when safety controls or gas and electrical connections are involved. Taking those steps today can limit damage and improve the service assessment.
The views, opinions, and recommendations expressed in this article are solely those of the author and are provided for informational and editorial purposes only. They do not constitute professional advice and should not be relied upon as such. OutSFL makes no representations or warranties regarding the accuracy, completeness, or applicability of the content and assumes no liability for any actions taken based on it. The views expressed do not necessarily reflect those of OutSFL.